How I installed the SOLAR PV system on a zinc roof.
One of the most challenging areas when installing PV on a Zinc roof is the preparation and minimising long term damage to the roof. There are a number of challenges on a standing seam roof.
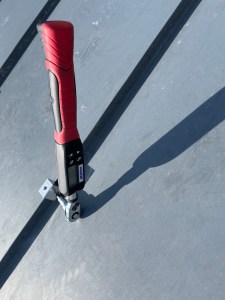
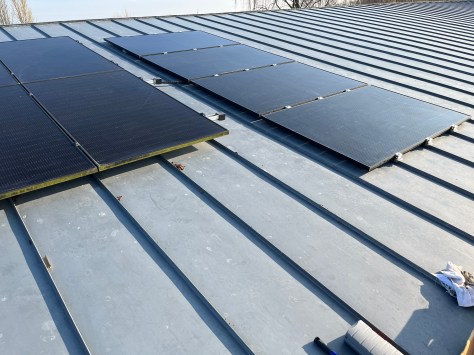
Zinc roof clamps that are designed for the exact type of standing seam on the zinc roof or rail system , Shown above is the S5 single screw mount for 0.7 mm zinc.
Cable routes that do not puncture the zinc.
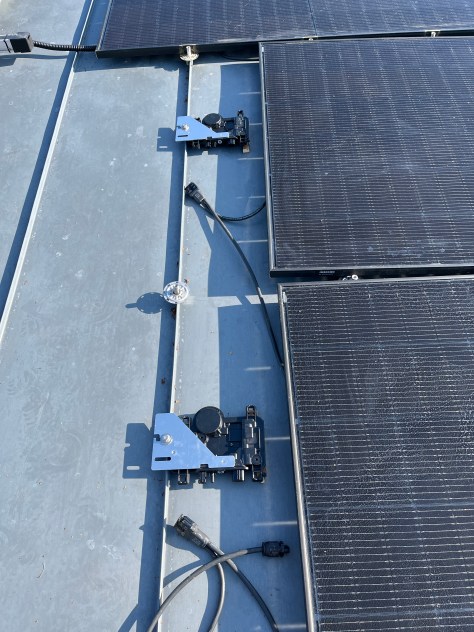
The advantages of the S-5-S system is that the panels sit on the zinc seam and allows one to have a very low profile.
Above and Below is an example on the mounting of the S-5 sytem with two new panels using Enphase IQ8 microinvertors.
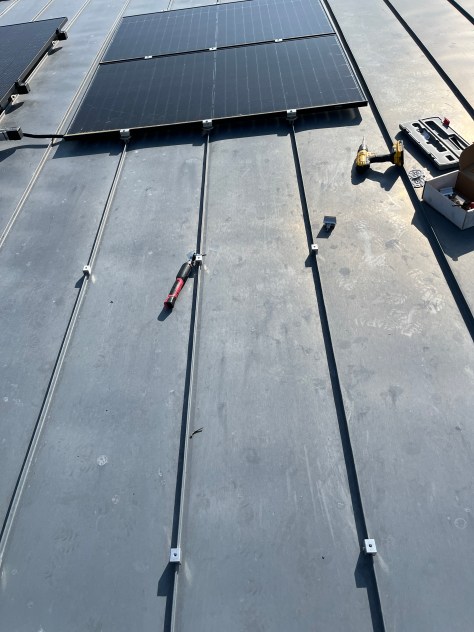
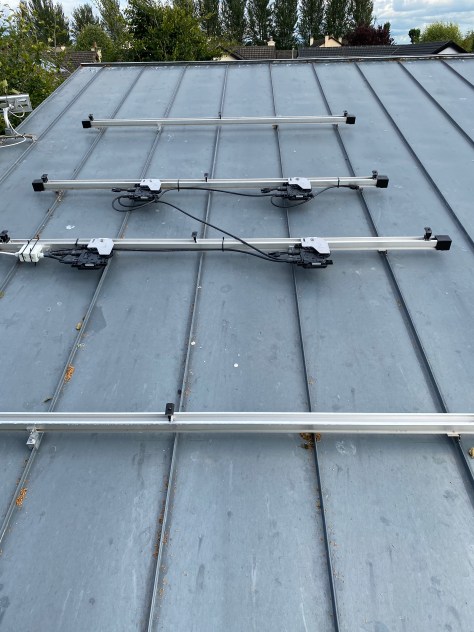
Rail Mounted System below
If one uses PV rails they need expansion joints perpendicular to the standing seam and the rail supporting the solar panels must not be longer than approximately 3 meters. This is to ensure that the zinc roof as it expands does not continously bend the seam over time and cause a crack on the seam.
The plan is to have all the outdoor lighting (Using LED -Light Emitting Diodes) operate from a 12 volt recycled car battery and recharged by a solar PV panel. The lights will be controlled by the in-built timer in the MPPT charger. This will keep the cable cost to a minimum (small cable size) and keep the voltage low enough to be safe in a garden environment (when digging and planting).
Parts Required
Below is the CIS thin-film solar PV Panel (copper indium gallium selenide ) I mounted on the shed roof.
Solar Battery Charger
I selected a 60 watt solar PV panel that was manufactured using CIS . This type of panel has a higher output voltage of 52 volts which work better with the charger I selected rather than the typical mono or poly crystalline cells of 30 volts . One needs to select a charger to suit the PV one buys. The panel was mounted on a 3 degree pitch facing south (see above) . During tests I found that this type of cell is more forgiving for shading and dirt (bird droppings mainly)-it maintains a consistent output power . For example when I partially shaded it with my hand it still outputs almost the same power. If one partially shades a monocrystiline /polycrystaline cell it will cause it to stop working as all the cells in the unit are wired in series.
Measuring the efficiency of the installation.
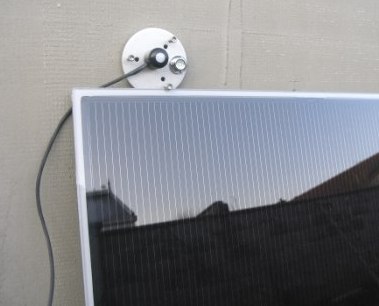
In order to check the efficiency I mounted a pyranometer at the same angle (top left of image) so that I could ensure that connections and charger were working correctly. One needs to know the input power in order to check the charger efficiency and that the system is working correctly.
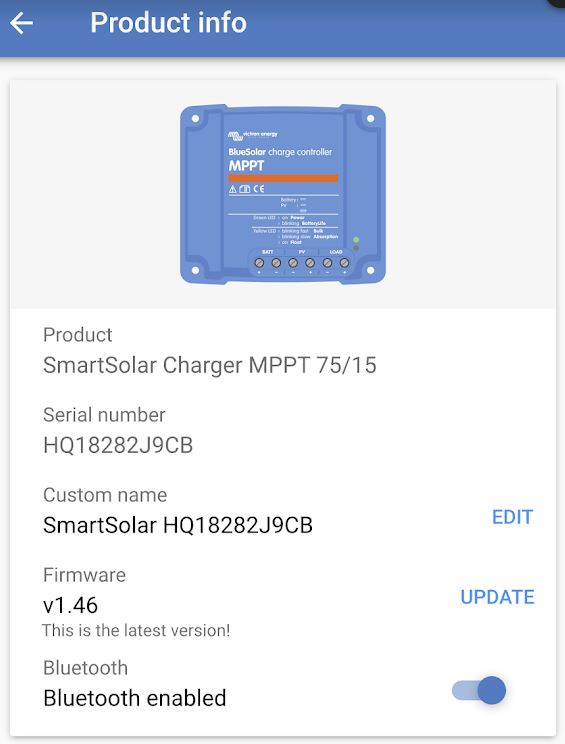
The MPPT Battery Charger
After reviewing products available I opted for the Victron SmartSolarCharger MPPT 75/15. This can charge a 12v or 24v battery system. When selecting a unit one needs an inbuilt MPPT which stands for Maximum Power Point Tracker. In Ireland and the UK this is important because of our natural cloudy weather which causes the solar panels to vary their output as the irradiance changes . What happens is that the solar panel’s internal resistance changes when the irradiance changes (sun shining on panel) -so the job of the MPPT charger is to change its load resistance as the solar panel’s internal resistance changes. When the load resistance matches the solar panel resistance then the maximum energy can be transferred to the load. If a charger did not have the MPPT then the efficiency of the complete system would be compromised. While there are different methods (algorithms) used to build MPPT units some are more efficient than others. Some of the different MPPT design options available are called perturb and observe , Incremental Conductance , short circuit current method etc., The idea of all these MPPT systems is to get the maximum power from the solar panel -some MPPT are low cost and others are more efficient in cloudy weather.
There are a number of advantages of the unit compared to others that I researched . It has charging algorithms for different battery types such as deep cycle and lithium ion. It has a bluetooth connection so that one can programme and monitor the output without other devices /connections being required. Another advantage is that it has a lighting timer that can automatically switch lights on and off at night or at dawn.
Some of the advertised benefits of the Victron MPPT unit are:
The Setup .
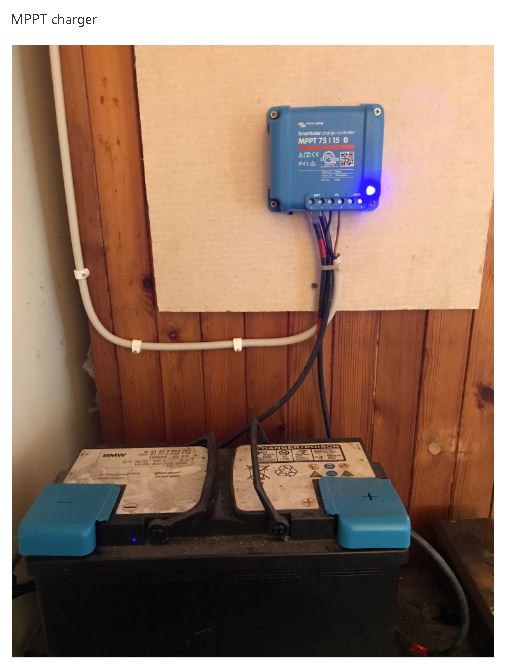
The setup is as follows . I plan to move the battery out of the shed as it is not best practise to have any battery system in a shed/garage/house because of the fire risk. The charger is mounted on a fire resistant material (Magnesium Board)
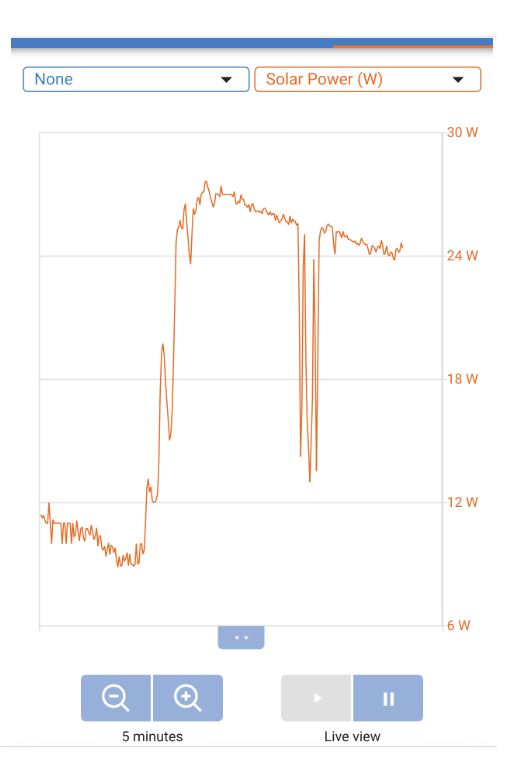
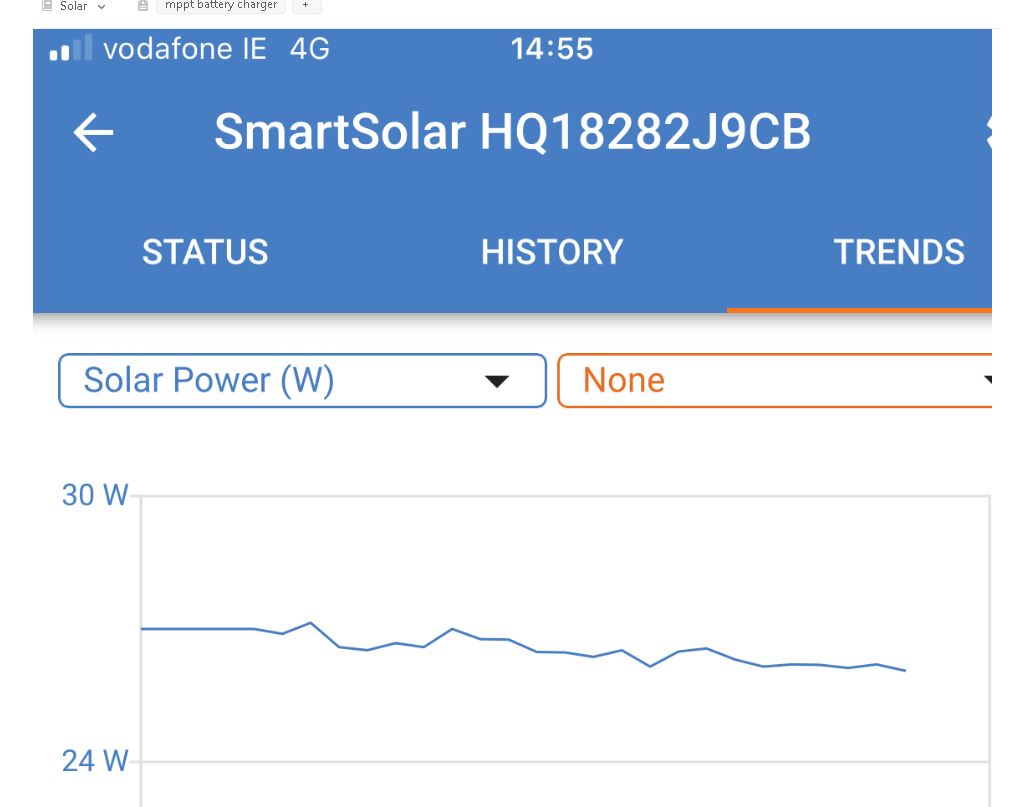
In order to access the data collected one logs on using the Bluetooth connection on your phone/tablet and the data is available. Below are different samples of the data available . The first indicates the solar power collected and the load usage. If the battery is fully charged it will take little or no power. If there is a load during the sunshine hours then the battery and solar panel will supply it.
Below is a chart showing how the MPPT charger adjusts its output/load to follow the changes in the irradiance levels (power from the sun) per second .
As I am able to measure the input power using a pyranometer I built I was able to see that the system was working efficiently. The data below is the output power from the charge controller when the input power from the sun was 471 watts/m2. The CIS panel provides 60 watts output when the irradiance is 1000 watts/m2 at STD (Standard Test Conditions) . This would mean that if the input power was 500 watts/m2 then the output would be 30 watts/m2. The data from the charge controller indicates an output power of approximately 27 w/m2 for the 471 watt/m2 input power.
Output power when Solar Irradiance input power is 471W/m2.
I came across information over the years that may help the self builder when it comes to retrofits (doing up an existing dwelling).
This is probably the most challenging of self builds as the options are few when it comes to insulating a house that was never designed to be insulated.
The other problem for the self builder is how well were the houses built in the first place -are the construction details good?. If they are good then it may be an easy step (it is evident that today there are problems with new builds. Could it have been any different in the past?)-for example were the cavities clean, state of repair of pointing, brickwork etc., .
A Guide to doing it right
The document below is a very good guideline on renovating an old building correctly when it has solid walls.
Check for any newer versions at their web site.
I extracted a sample of the contents from the above guide by way of example.
It also needs to be realised that by adding insulation to a wall that was not designed for insulation can make the house colder if the solution is not correct, structurally damage the wall over time or cause mould on the inside that may affect your health. The above report goes through this.
Objective
The above will hopefully guide the self builder away from the problems and find the correct solution.
One needs to fully understand that one needs to choose the most robust solution that can withstand something going wrong.
Possible Products
Some of these products may be safer to use when it comes to old buildings . Some require extra measures to ensure they keep the building dry and you warm.
I recently came across a few videos from America on the subject of building physics. They may help the self builder when trying to figure the wall system, roof design or insulation to use.
The videos are presented by Joseph Lstiburek who outlines the do’s and dont’s in a very direct manner. He is the founder of Building Science Corporation.
In the videos he references the American method of describing heat loss which is the R value (resistance to heat loss per inch- a higher number is better) while in Europe we mainly use the U value (ease in which heat travels through an object-a lower number is better but it includes boundary air films). The Rvalue is the thickness of the insulation divided by the K value or in the examples presented by Joseph Lstiburek the R value of 2 of the Irish building is approximately equivalent to a U value of 0.5.
This video starts with the progress for insulating buildings in 1000 years (starting with an Irish Church) and covers the perfect wall, roof and slab and the importance of designing buildings for the climate they are situated in.
Video (Below)
Commercial Thermal Bridging , LEED Building Problems, Water problems.
Physics Discussed (2nd law of thermodynamics)
Heat flow is from warm to cold
Moisture flow is from warm to cold
Moisture flow is from more to less
Air flow is from a higher pressure to a lower pressure
Gravity acts down
Quality Assurance-Figuring out what the right thing to do is
Quality Control– Executing it
The building layer order of importance for a wall, roof and slab and the importance of continuity between the layers as shown below in order of importance.
Water control layer
Air control layer
Vapour control
Thermal control
The 500 year wall-Keep the water out of it. Allow the vapour to get out from the inside or outside if it gets in. Keep the air out of the wall from the outside and inside. Put all the thermal layers on the outside and put the cladding on the outside.
He also analyses the LEED energy standard.
To Vent or not to Vent (Roofs-cold, warm and SIPS)
This video covers venting and airtightness of SIP roofs.
What happens when one uses a white roof membrane versus a black one.
Building Enclosures
Why increasing insulation is a game changer in the future . Moisture and durability issues that lie ahead because of extra insulation.
I really like the possibility of converting light to electricity. In the spirit of innovation I will simplify the PV system and reduce the cost by returning to using DC power directly from the PV panels. As I have no intention of transmitting power around the countryside this is another reason for staying with DC.
The passive house standard I feel helps in this approach by reducing the energy required in a house to a very low level which creates the synergy to make this leap for me to design a DC power heating system for our house.
Solar Background Information
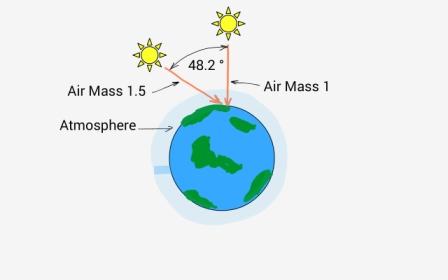
The energy from the sun varies throughout the year due to cloud and the amount of air mass (AM) it has to pass through to reach the earth. When the angle of the sun is low in the sky the solar energy has to pass through more air which means less solar energy is available to convert light into electricity (example winter months).
Air Mass
When a PV manufacturer quotes the output power of their PV panel the international standard is to quote the output power at an air mass of 1.5 . An air mass of 0 is know as outer space where no air exists (AM0) . This is where the maximum energy can be captured if one lived in space. An air mass of 1 is when the sun is at its highest point in the sky (AM1) when on earth. The AM value of 1.5 is around 48 degrees off the highest point on earth.
Measuring the Solar Energy (W/m2)
In the winter months from tests I have carried out with my pyranometer ( a device that measures the solar energy-see below) the solar power I am recording with a data logger was between 0 and 400 watts per m2 (It can be higher on sunny days). In the spring/summer months the power can reach 1000 watts per m2 and more.
Pyranometer for measuring Solar Energy (Sensor top left of image and Solar Panel under test beneath it)
Harvesting Solar energy in the winter months for me is the priority which will entail the correct location and angle of the solar PV panel for the winter sun. The strategy is to try capture as much of the winter sun as possible by balancing the solar gain of the glass in the south windows of the house (part of the passive house performance phpp calculations) and supplement this with the DC (Direct Current) electricity from solar PV panels to provide space and primary heating etc. It is very noticeable at this stage of the build the real benefit of gathering energy from the winter sun through the glass. (See previous blog on performance data 23/05/2015).
In order to give an idea of the solar energy available I recorded the irradiance when the sun was behind a dark cloud (see image below). This equates to around 200 watts per m2 solar energy. When the sun came out from behind the cloud it reached over 1000 watts per m2 in the month of April.
Sun behind dark grey cloud is approximately 200 W/m2 of solar energy (above image). Most inverters start to loose their effeciencys at this point.
Sun behind dark grey cloud is approximately 112 W/m2 of solar energy on the typical overcast day. Most inverters would stop working at this level.
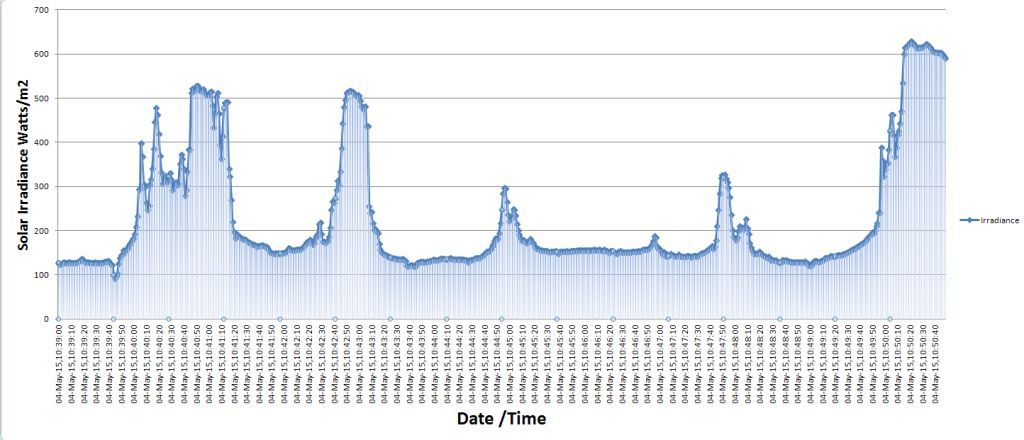
Below is an example of the changes that take place on a sunny/cloudy day in May
Solar Irradiance Level examples over a 10 minute period.
In the above chart one can see an example of how difficult it is for an inverter to keep working efficiently (they work efficiently from approximately 200 w/m2). The bottom line on the left is 100 watts/m2, The top line is 700 watts/m2 (click on the image to see more detail) . In the winter time values from around 50w/m2 to 200w/m2 are the lower limits and the upper limits are around 600w/m2.
Self Build Homework (Develop a DC powered Solar Harvesting Unit)
For the above I do need to find a way of maximizing the output power of the PV panels as the iradiance varies. For this I need to develop a simple black box (a small amount of simple components) that will match the solar energy created by the PV panels and maximise the output over the winter months. I am close to having a working prototype to see this in action (all tests look good so far ).
The equipment to be purchased for the above will be 4 solar panels and the mounting brackets. 4 solar panels will provide around 1 KW of power (max). This will cost around €1000. More groups of these will be added in the future. (If any one has 4 spare panels to loan so that I can test the control unit I am building – please let me know.)
In essence I plan to create what I call a DC Solar Harvesting Unit (DCSHU) that will have specific electric power functions around the house.
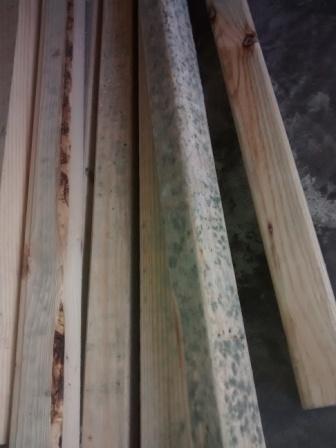
An item I feel worth monitoring is the supply of wood for internal use (untreated wood –no preservative used ). By monitoring I mean the moisture content. For example I received battens for the ceiling fixing of plasterboard. Some batches after 2 weeks grew mould. It was luck and the fact that I was not ready to install it that averted a real problem if it had been nailed to the rafters.
Mold on wood supplied
I did comment mentally to myself when I was carrying it into the house that some pieces were much heavier than others but that experience did not cause alarm. A symptom that I now know is that they were wet and this has a consequence.
In order to monitor the moisture content of dry wood supplied by building providers on site for the likes of battens that are used to secure plasterboard I will from now on use a moisture meter. When my supply was delivered I did not have a wood moisture meter at hand (they cost 20 to 30 euros). I do now . Even though the wood was purchased and supplied as definitely dry . Once I had it stacked indoors certain batches were obviously not as promised as mould started to appear within two weeks. The lesson going forward is have a moisture meter at hand. Test it while still on the lorry and send it back to the builder providers if the moisture levels are too high.
The pitch of both roofs is 12.5 degrees. The architect choose this in order to optimise the solar gain during the winter months and ensure both buildings receive adequate light.
There is a roof overhang of 1.8 metres in order to control the solar gain during the summer. (See below)
Passive House Summer Shading
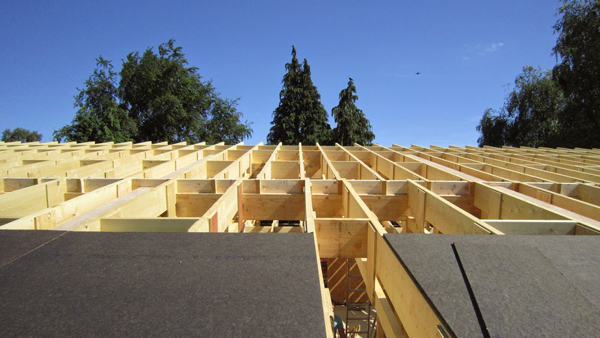
The build up of the roof from the inside is : Plaster Board, 40-100mm service cavity, airtight layer, 400mm metac isover semi rigid 0.34 k insulation, bitumen impregnated wood fibre board, membrane, ventilated cavity, OSB, DELTA®-TRELA membrane and then zinc.
Internal Roof Build Up using Wood Fibre Board
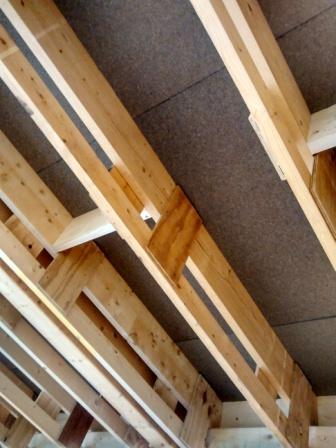
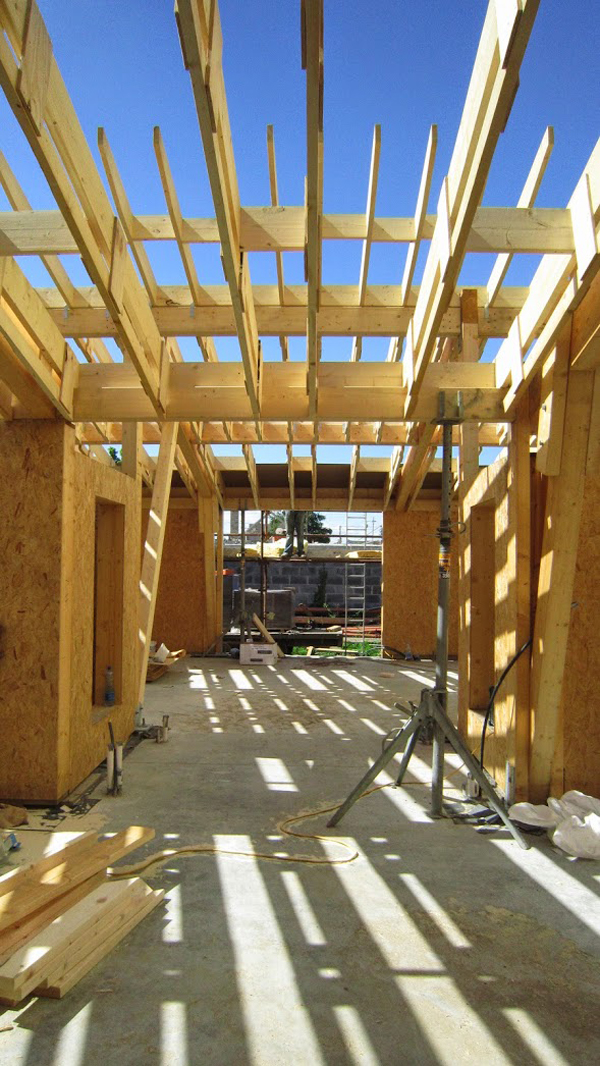
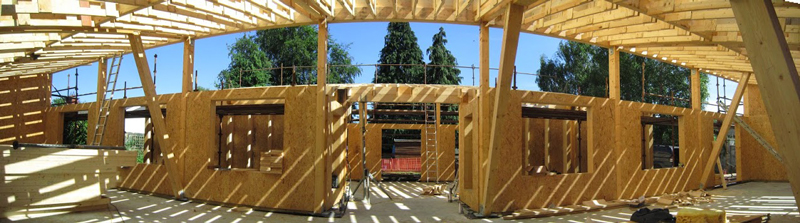
We thermally broke the rafters where possible see above.
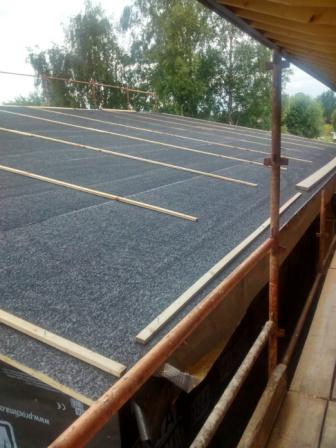
Delta Trela is the base material for the Zinc
Planning Permission Factors
In our planning permission reference was made to standing seam. This restricted the options for controlling costs later on. (A lesson for others). As it turned out for our design there were no variations in the roof (ie no openings, different pitches, etc and this kept the costs under control. )
Design Factors
If one is designing from scratch note that tiles/slate options start with a minimum pitch of approximately 12.5 degrees (example: the melodie single pantile). During the design stage if one can simplify the design of the roof by minimising openings for roof lights, ventilation flues and any architectural details this will keep the costs under control.
An early idea I explored was to use amorphous solar electric panels (PV) built into the roof -I was unable to come up with a solution in the time frame and deal with the potential risks such as Fire/Insurance/Waterproofing and Hygrothermal issues of an intergrated roof solution. I will revisit this idea in the future.
When one selects low pitch roofs the options I am aware of are a green roof, EPDM (ethylene propylene diene terpolymer), and metal roofs. I considered the green roof but the hydrothermal analysis using Wufi software necessitated a different build up of the roof layers and the other reason was the need to apply for a change in our granted planning application.
Zinc can be placed on spaced untreated wooden battens without a membrane – a cost saving is possible using this technique.
All fixings nails and screws are either grade 2 or 4 stainless steel.
New Roof Products
In the last month I came across a promising roof and wall facade system that acts as a solar hot water panel and it uses the drainback system (see previous blog on drainback system). The company is called http://www.aventa.no . As previously discussed it is too late for me to plan for this . What needs to be clarified is the cost of storage and panels .
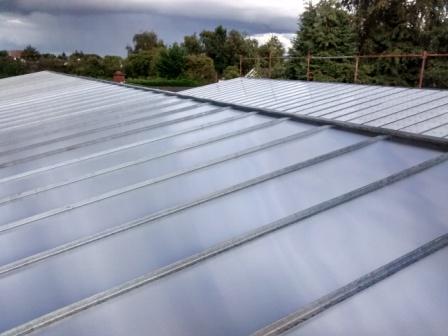
When one is getting a quote from any zinc installer ensure you specify the same product. I found that the Zintek(be careful there is another name that sounds similar called Zintec but it is not zinc) was cheaper than Rheinzinc and the installers usually know which zinc is good. Ask for their opinion (as they are working with the material). Think whether you can use non patinated (natural) zinc in some places as it is roughly a €1 cheaper per kg. The non patinated zinc eventually returns I believe to the same colour as the patinated zinc. We were advised not to use non patinated zinc in areas where different weathering could occur. So for all the fascias/sofit and edging details visible we used patinated zinc. As zinc is a traded commodity on the stock market prices vary.
Non Patinated Zinc before weathering
Zinc Installation
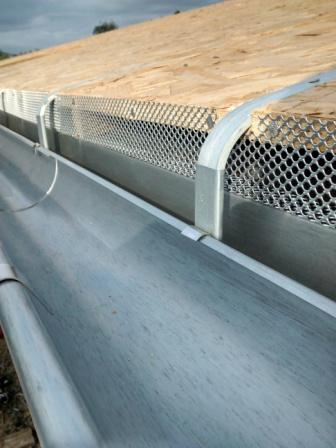
The zinc detail for the gutter were as follows. A ventilation/insect grille can be seen below.
Roof Gutter Detail
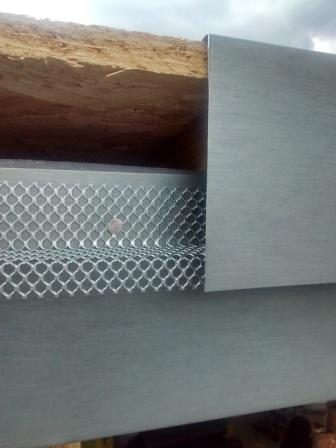
The ventilation/Insect grille on the overhang is as shown below. A detail to satisfy the engineer and the zinc installer was agreed as proper ventilation and air flow was required for the roof.
Roof Overhang Zinc Detail Passive House
Lightning Protection
I must do more research on this as little appears to be available..
As the building is a wooden frame structure the choice of insulation was limited. Cellulose ( K value around 0.039 W/mK ) was the preferred option but I opted for Isover Metac semi rigid insulation with a K value of 0.034 W/mK in order to keep the wall thickness to a minimum (currently 430 mm including a service cavity giving a U value of 0.09 W/(m²K) and to be able to do some of the work myself.
The roof U value is 0.102W/(m²K) and the thickness is 530 mm with 400 mm of Metac. Other insulating options were wood fibre board, sheep’s wool but the cost of theses was prohibitive in our build. A good explanation of these technical values can be found at the Rockwool Basic Theory link Insulation terms.
When insulating the wall structures (whether it is block-work, straw, hemp,wood etc) one is always trying to work out what could go wrong if some part of the building fabric failed and how would it correct itself if it goes wrong. A wall structure that is capable of drying out in the Irish Climate is the goal. What might work in Germany or another country may not work in Ireland.
In our build I considered using block work outside the wooden frame because of the lower cost. It turned out after a Hygrothermal analysis with Wufi that there was a greater potential for the wall not to dry out over certain seasons because of the amount of insulation in the walls limiting the thermal buoyancy that primarily assists air to circulate in a cavity. The more insulation that is placed in a wall the less heat can escape to dry out the wall and create warm air that assists thermal buoyancy in the cavity. In our build we placed the OSB racking board inside the wall away from the external cavity because the structural engineer from my understanding advised that the increase in moisture could affect the structural integrity of the OSB as per his Wufi anlaysis. This potential risk was avoided rather than experiment with a worst case scenario.
One I feel has to plan for the worst case scenario. If I had used polystyrene or a PU/PIR insulation material in the wall I feel the risks would be greater in a wooden frame structure.
Fiberglass Samples
We tried a few different company samples of fiberglass and settled for the isover product Metac because the available sizes were compatible with the structure and the extra rigidity it appears to have when placed in the ceiling space ie. it stays in place between rafters without any support. I initially thought at the planning/design stage I would need insulation netting on the ceiling but this was not necessary.
Metac Semi-rigid shown on the left. Knauf on the right.
Strategy to deal with Fibreglass
The installation strategy I chose for the insulation was that no fiberglass product would be used inside the airtight membrane for sound proofing or insulating purposes in order to minimise fibers in the air. A name I have given this is the zoo approach (keep the fibers behind the airtight membrane like in a zoo where the animals are behind the glass).
When cutting the insulation it needs an extra 10-20mm in order to ensure that it fits perfectly otherwise extra effort is required to place it in position. This is a very small tolerance when cutting a circular roll of insulation of 550mm diameter.
Tools
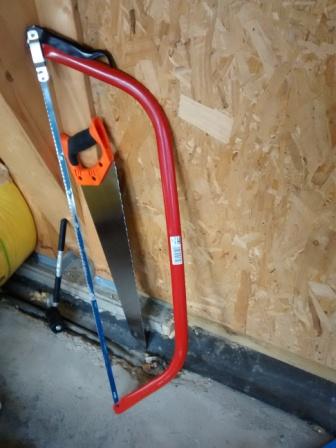
The existing tools I came across for cutting the fiberglass were as follows:
The standard wood saw
Insulation Saw (creates a very clean cut with minimum fibers in the air but it has difficulty cutting through the plastic cover of the insulation)-
Manual Insulation Saw
Electric Insulation saw (I did not buy one but this is what one looks like.) –
Dewalt Electric Insulation Saw DWE 397
Hand knives such as Stanley knives.
I could not find any tool that I could hire to cut the insulation in order to improve the accuracy of the cut nor speed up and simplify the installation. I tried a few ideas myself from a mechanical saw with senior hacksaw blades to an automatic tool I put together. I will return and develop a tool from what I have learned.
Home made tool-my preference was to use this tool I put together which was made up of 3 hacksaw blades. It allows one to roll the insulation on the floor and cut it as it is rolled.
Home made saw with hacksaw blades.
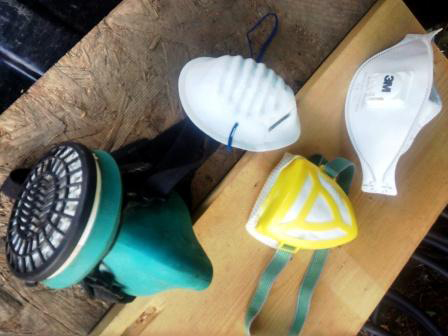
Protective Equipment
I tried numerous dust masks and the one I settled for was the 3M 9322+
Masks Tested-Prefered the 3M 9322+ Mask
The other ones got too warm, did not keep out the insulation or caused the goggles to fog up.
When working on the ceiling a full visor mask worked out the best.
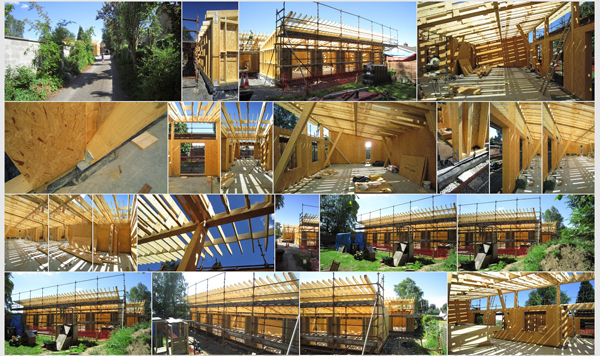
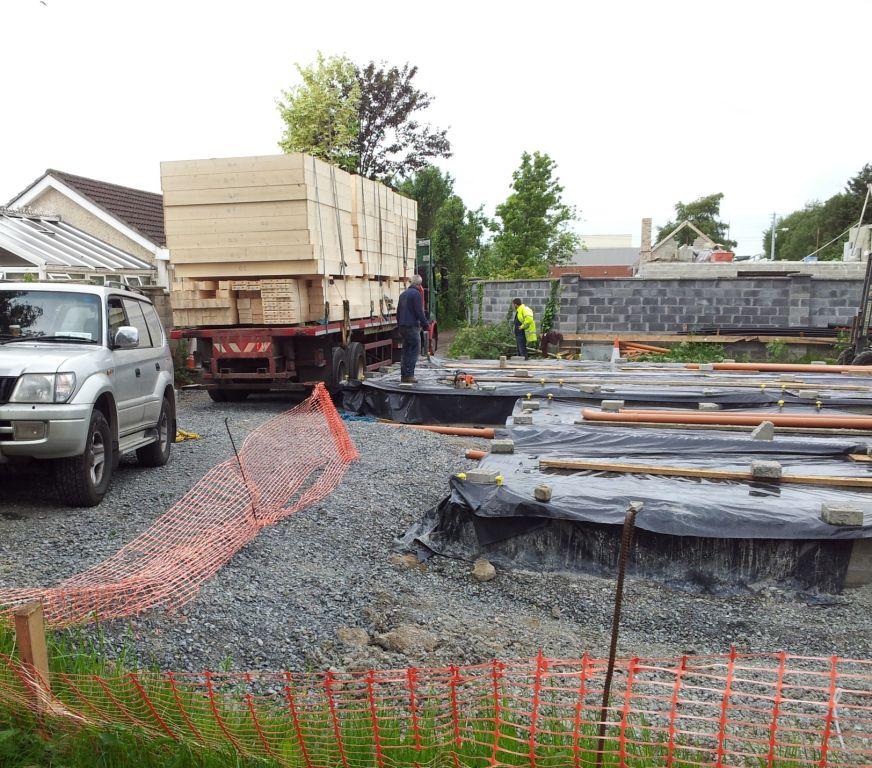
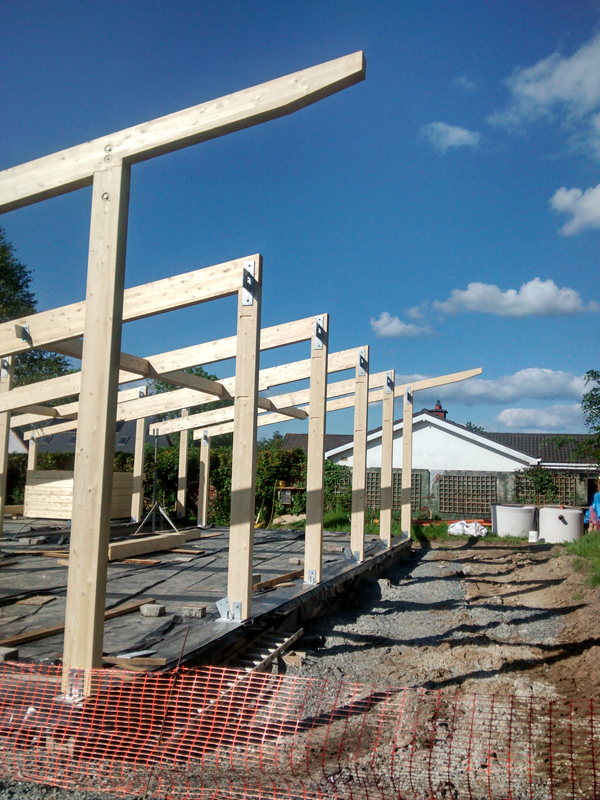
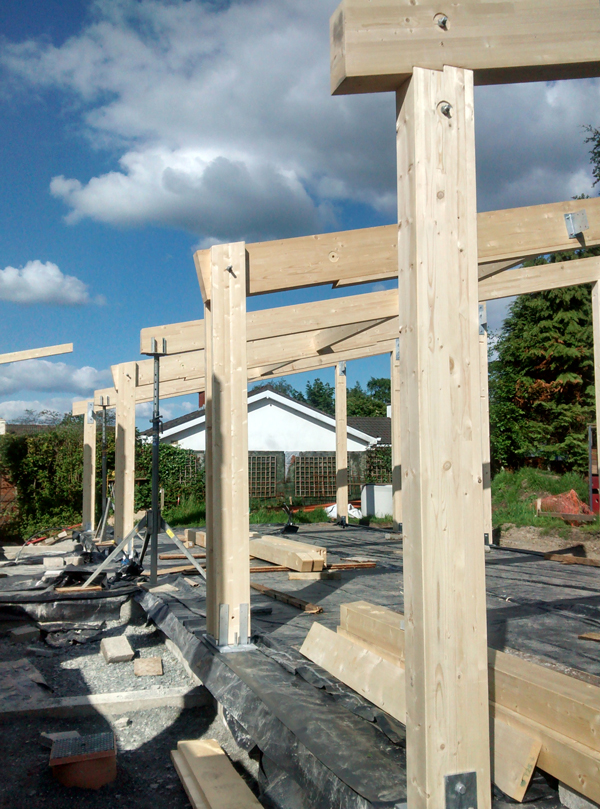
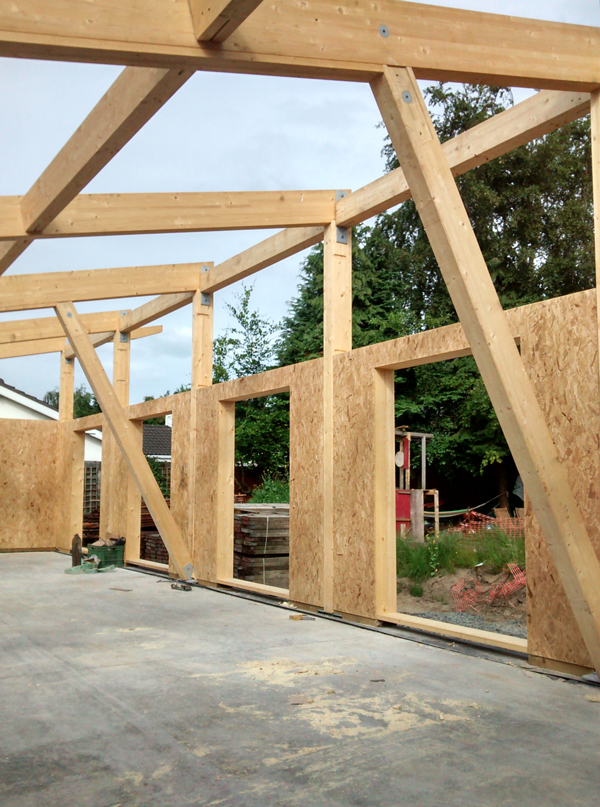
Work progresses on the wooden frame. As other self builders attest at certain times in a self build project the build moves quickly. This is one of those times.
The arrival of the house frame is always a defining moment as it means that stage one of the concrete foundation is ready as per specification.
Self Build Passive House
As previously mentioned a few of the reasons for selecting a glulam beam system was that it allows for a flexible open plan design in the future where internal walls can be moved. It should also simplify the air-tightness strategy and the running of services.
Frame Arrival
The first few days were spent installing the posts and brackets.