November 3rd to December 3rd -2025-The total power consumption to heat the house excluding water heating was 184.11 KWh which equates to approximately 6 kwh per day to heat the house to the slightly higher temperature of 22 degrees in the main living area and the dining/kitchen room to 24 degrees 24 hours a day.
Solar PV generated November =60kwh from the 3kw pv system.
December 3rd to January 3rd -2026- The total power consumption to heat the house excluding water heating was 232 KWh which equates to approximately 7.73 kwh per day to heat the house to the slightly higher temperature of 22 degrees in the main living area and the dining/kitchen room to 23 degrees 24 hours a day. The total for the space heating season is 416kwh to date.
Solar PV generated December =32kwh from 3kw pv system.
January 3rd to February 3rd -2026- The total power consumption to heat the house excluding water heating was 286 KWh which equates to approximately 9.53 kwh per day to heat the house to the slightly higher temperature of 22 degrees in the main living area and the dining/kitchen room to 23 degrees 24 hours a day.
Solar PV -from January 3rd to February 3rd the 3kw system generated 45.4KWh which equates to about 17% of the energy for heating the house if all the solar was used for home heating .
Updated on the 5th March -2026
February 3rd to March 3rd-2026- The total power consumption to heat the house excluding water heating was 205 KWh which equates to approximately 6.8kwh per day to heat the house to the slightly higher temperature of 22 degrees in the main living area and the dining/kitchen room to 23 degrees 24 hours a day.
Solar PV -from February 3rd to March 3rd the 3kw system generated 87.5KWh which equates to about 40% of the energy to heat the house if all the solar was used for home heating . Half of the solar PV installation is pointed North at an angle of 12 degrees. The other half of the PV system is mounted flat (3 degress) , south and shaded .
Selection of a Low cost heating system for a passive house.
There are a number of options to heat a home when energy efficiency is designed into the build from day one. This statement is particularly true when one aims for the passive house performance standard using the PHPP (passive house planning package) software. When we moved into the house one will see from a previous blog that we started out with two storage heaters to heat the house with off-peak electricity with a capital cost of €70 (One storage heater was free and the other we paid €70 ).
Times have changed and the next energy crisis came along in 2022. We now have switched to a 1.6 kw air to air heat pump . These units are cheaper to run and more efficient than other types of heat pumps or heating systems. The other reason a dedicated home heating single unit was selected was to simplify maintenance. The hot water system is independent of the house heating.
One benefit of using an air to air heat pump to heat the house was the realisation that in Ireland when one returns home after being exposed to a damp cold climate it was difficult to thaw out quickly when the whole house temperature was 20/21 degree Celsius when using the storage heaters. By careful placement of the heat pump one room in the house is now at a higher temperature. This almost equates to a fireplace being available to help drive out the dampness one absorbed. We also noticed the room is used more frequently.
The room we selected was the kitchen/dining room. I feel it is important to ensure that the warm air the unit is blowing out does not interfere with the area one uses near or under the unit. This particular unit has an upward air circulation option that can limit this but we still installed it in an area that is not a functional working or sitting area.
To select the correct size of a heating source one needs to review the passive house PHPP software for your home. In principle the passive house standard selects the coldest day of the year for this calculation. In Ireland the PHPP software uses local climate data installed in the software to calculate the heating required for the house. This equates to approximately 1kw of heat for every 100m2 of floor area. As our home is 200m2 we needed 2 kw output on the coldest day of the year (similar to the power a toaster or hair-dryer uses for the coldest day).
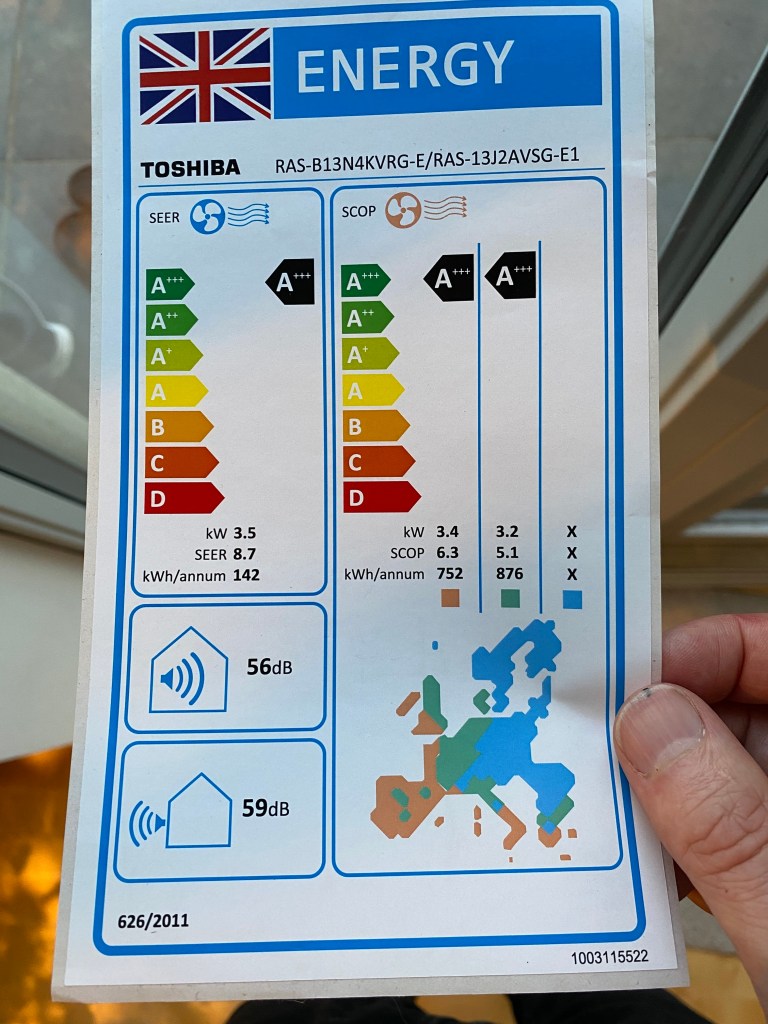
The Air to Air heat pump we used was the RAS-B13J3KVSG-E internal unit and the RAS-13J2AVSG-E1. These were one of the most efficient and economical units I could find. The price of the unit was around €600. Installation was another €1000 approximately. There are designer internal heat pumps options available from the same brand if one want to make the unit a design feature.
How the heat pump works -All heat pumps harness the natural heat energy present in the environment, air-to-air heat pumps can amplify the input power, resulting in a higher output. This is known as the Coefficient of Performance (COP), which measures the ratio of output power to input power. A higher COP indicates greater efficiency, and air-to-air heat pumps typically have a COP of 3-4, meaning they can produce 3-4 units of energy for every unit of electricity consumed. The air to air heat we installed has a SCOP of 6.3 and the designed heating load for the year is 752kw/h per annum. This approximately equates to €25 a month for a 7 month heating season @23 cents a kw/h. The letters SCOP is a seasonal calculation for the full heating season. In our unit the COP can produce 20 degrees inside if the temperature is 7 degrees outside.
There is also a function to cool the house with an air to air heat pump when global warming arrives in Ireland. Ireland missed the global warming cycle this year (2024) so we did not need to use this function.
Part 2 -Installation, performance and lessons learnt after 1 year of use…to be continued…
When the sun is close to the horizon Solar PV Panels generate less energy than when the sun is directly over the Solar Panel.
The reason for this is that the sun’s rays pass through more of the atmosphere thus reducing the sun’s energy (photon energy) on the PV panel. If it is an overcast day they will produce less energy. To translate this into numbers- in the winter when the sun is low in the sky (say 14 degrees from the horizon ) the total irradiance from the sun measures around 780 W/m2 (watts per meter square) with a clear sky. In the summer one would expect to see 1100 W/m2 (55 degrees from the horizon). The bottom line is that if one can point the solar panels perpendicular to the sun one will get a higher electrical output power.
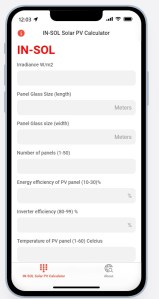
In order for consumers to purchase and compare solar PV panels manufacturers have agreed a way to compare the output power of Solar PV panels and this test is referred to as Standard Test Conditions (STC) . The test is done at an irradiance of 1000w/m2, at a air mass of 1.5 (approximately 42 degrees from the horizon) and at a temperature of 25 degrees. The value w/m2 is how solar irradiance is measured while the PV panel output power is measured in watts. The following calculator will help you understand how the output power of your PV System (in watts) is affected by solar irradiance and other factors. Check your Solar PV Output Power in watts.
Solar PV Calculator
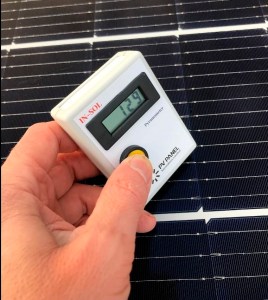
Most roofs have a pitch of around 35 degrees. The best direction to point the solar panels is usually south but with some solar PV installations, it is possible to have some pointing South and others pointing West in order to collect as much energy as possible during the summer. Meters used to measure solar irradiance are called pyranometers, Solar irradiance meters, or solar radiation meters. An example of how these meters are used to locate, measure, and check if your Solar PV system is working efficiently is shown below. The calculator above can be used with these meters. An affordable pyranometer can be seen here https://pvpanelinnovations.com/
PV Panel Shading
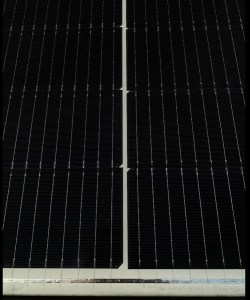
A factor that has a significant impact on the output power of a PV System is shading on an individual Solar PV panel. This can take the form of chimneys, trees or other houses. The reason for this is that if one examines each solar panel one will see that it is made up of individual cells wired together in series to make up a full solar panel (see below). If one or more cells are shaded when installing a traditional solar PV system (One inverter) the output power is reduced for the whole system. There are other solar PV systems that use microinverter’s or DC optimizers that will not be seriously impacted by shading thus the consumer will generate more electricity.
Solar PV
Another factor that significantly reduces the solar panel output power generated is the panel temperature. We are lucky in Ireland to have a mild climate with day temperatures not usually going above 20 degrees (on a good day). What this means from a practical perspective is that a solar panel in Ireland will generate more power than a solar panel in Spain on a cloudless day.
Solar PV Components.
The components that typically make up a solar PV system are PV rails which support the PV panel , roof brackets/hooks that connect the rail to the standard tile or slate roof and clamps that connect directly to a specified roof types such as zinc or steel roofs. There are separate pv panel mounting systems for flat roofs or ground mounting. If one wants to explore PV mounting system suppliers -use a google search for “roof mounting systems for solar panels“. As I used a zinc roof one must ensure expansion joints are installed in the pv rail every 3 meters.
PV Panel Types
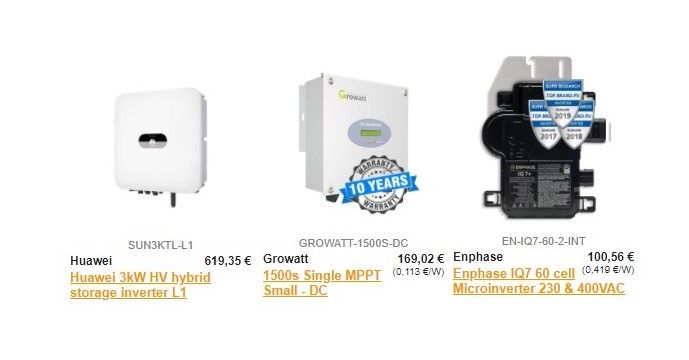
There are three types of PV panel cells -monocrystalline (these aesthetically have an even black finish –shown above), Polycrystalline which have an uneven shade of blue crystal cells and CIS types. Monocrystalline are more common and are slightly more expensive than polycrystalline and CIS are now more difficult to purchase (shown in part 1 of the blog). The options available when selecting PV panels other than the type above are length of equipment warranty and length of manufactures performance warranty. The majority of PV panels generate DC (direct current). All PV panels must be angled at least 3 degrees from the horizontal. PV panels produce DC power and to give you an idea of what 4 panels can produce and the energy they can generate for a load, loose connections or cable damage please see this video .
Inverter Options
Inverters are principally available in 3 types -one central inverter for a full PV installation without battery charging, a central inverter that has inbuilt battery charging facility and micro inverters for individual panels or a pair of PV panels.
Central inverters. The important factor here is the warranty length and how many MPPT (maximum power point tracking) channels does the inverter have. If one was installing 8 panels in two rows (strings), two separate MPPT channels would mean that the two rows of 4 panels would have their own ability to generate power independently of the other row (string) so for example if one row of pv panels got dirtier/shaded or a fault occurred on one panel the other row would keep generating at full power. As all PV panels are not exactly the same the separate MPPT channels allow for a higher output yield . When selecting an inverter one must match the PV Panels to a particular Inverter. Once this is done adding more panels can become restrictive and may mean that one needs to change the inverter again. If the inverter fails the whole system fails. If one needs to change a PV panel in the future the central inverter may also need to be changed.
Inverter Options for SOLAR PV
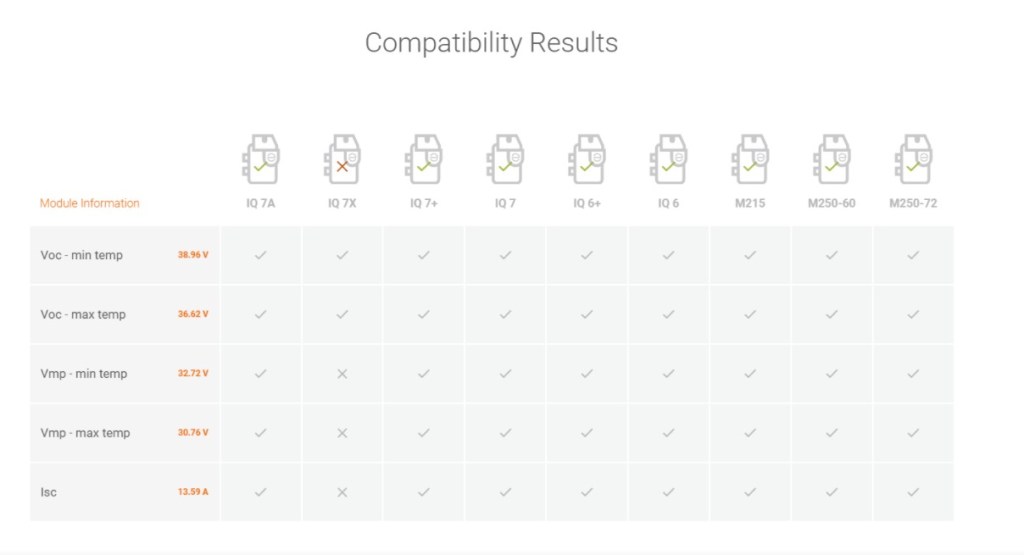
Micro Inverters-simplify the installation of a PV system and permit simple expansion. It is really close to plug and play . Because they are paired with a PV panel they manage shading better than a central inverter. The voltage generated is also different to the central inverter in that it produces low voltage AC -the same voltage as all domestic appliances like fridges, washing machines etc. There is also less of a chance of fires because of loose connections/damaged cables. They offer full management of your PV system with apps and individual panel performance monitoring. Pv panels must also be matched with the individual inverter using the PV panel data sheet. This is one such calculator.
Enphase Calculator
Batteries
As stated before I personally am not in favour of using batteries for PV panel installations. The reason is that batteries are expensive, they are another failure point and I feel they are needed for vehicles more than PV installations. For example, a 300 litre water tank can store 20kw of energy at 60 degrees (a stainless steel water tank would cost around €1000-while a similar battery could cost €10,000 to €15,000 and still would need to be replaced after approximately 6000 cycles). All homes need hot water thus sending any excess electricity from the PV panels could be fed to a hot water tank. So instead of adding batteries why not consider changing the hot water tank and place elements at the bottom of the tank and the middle of the tank.
Another good idea is to switch to night time electricity which currently is half the price of the day unit to supplement the lack of PV power during the winter to heat the water tank.
My preference is to install a side arm heat exchangerto the water tank so that I can achieve better hot water stratification. Stratification is the creation of layers of hot water free from movement/mixing when one heats water. What happens for example is when cold water enters the tank at the bottom it can mix the stratified layers of hot water thus reducing the water temperature. It is difficult in Ireland to purchase water storage tanks that have simple devices fitted that maximise stratification with devices such as an inlet baffle on the cold water inlet .
To complement the above use of a water tank one can add a single shower pump and feed all showers from the tank.
Typical Shower Pump around €157
The above will reduce the use of electric showers which are the highest electrical energy consumption devices in a home. From personal experience, I can say that 150 litres of hot water (half a 300 litre tank) can provide 6 showers a day. Currently, I use off-peak electricity to heat half the tank.
If you are a new build one can plan to install the shower pump outside the house in an insulated chamber below ground level near the tank. This is what I have done to reduce the noise as we have a single-story home.
For those building to the Passive House standard the HRV is independently tested by the Passive House Institute. They provide a full list of certified units at the following link Passive House Certified Heat Recovery Units.
HRV Efficiency (How is it calculated)
There are principally three methods it seems. One is the Supply method (used by manufactures) and this usually gives a higher efficiency value than the real world values. The Extract efficiency method is used to give a closer to real world value and then the passive house efficiency method which adds the following formulae to the Extract efficiency method.
Pel = real electrical power, W
M = mass flow, kg/h
Cp = specific heat of the air, kJ/kgK
The good news is that it appears if the HRV is certified to the Passive House standard then the difference between the supply method and the extract method is very small.
In the near future I plan to connect to the HRV unit I purchased and view the efficiency values.
The Passive House certificate shows the following
HRV Calculation
Cost Efficiency
The most cost efficient unit I came across was the Airflow DV145 passive house certified unit for our 200 m2 house with an airflow capacity of 542 m3/h. I paid around €2200 for it. If one has a smaller floor area then more savings can be made by using a smaller unit. As a self builder technical support was important and their main offices are in the UK.
If one opts for a non-certified HRV unit a 12% reduction must be applied to the manufacturers specification . Some manufacturers might not renew the certificate each year so it is a good idea to ask if a certificate exists. The data must be entered in the planning software for the passive house. For those interested in the passive house planning software (PHPP) there are courses run in Ireland frequently so I would suggest that one does this 3 day course (typical) and usually one finds the software discounted on the course.
It is an enjoyable course where one can select your own pace (the first time I did the course I wanted to listen and learn rather than calculate the performance of our own home). One such place is http://www.passivehouseacademy.com/