Building Science and Physics

I recently came across a few videos from America on the subject of building physics. They may help the self builder when trying to figure the wall system, roof design or insulation to use.

The videos are presented by Joseph Lstiburek who outlines the do’s and dont’s in a very direct manner.  He is the founder of Building Science Corporation.

In the videos he references the American method of describing heat loss which is the R value (resistance to heat loss per inch- a higher number is better) while in Europe we mainly use the U value (ease in which heat travels through an object-a lower number is better but it includes boundary air films). The R value is the thickness of the insulation divided by the K value or in the examples  presented by Joseph Lstiburek the R value of 2 of the Irish building is approximately equivalent to a U value of 0.5.

This video starts with the progress for insulating buildings in 1000 years (starting with an Irish Church) and covers the perfect wall, roof and slab and the importance of designing buildings for the climate they are situated in.

Video  (Below)

Commercial Thermal Bridging , LEED Building Problems, Water problems.

Physics Discussed (2nd law of thermodynamics)

  • Heat flow is from warm to cold
  • Moisture flow is from warm to cold
  • Moisture flow is from more to less
  • Air flow is from a higher pressure to a lower pressure
  • Gravity acts down

Quality Assurance-Figuring out what the right thing to do is

Quality Control– Executing it

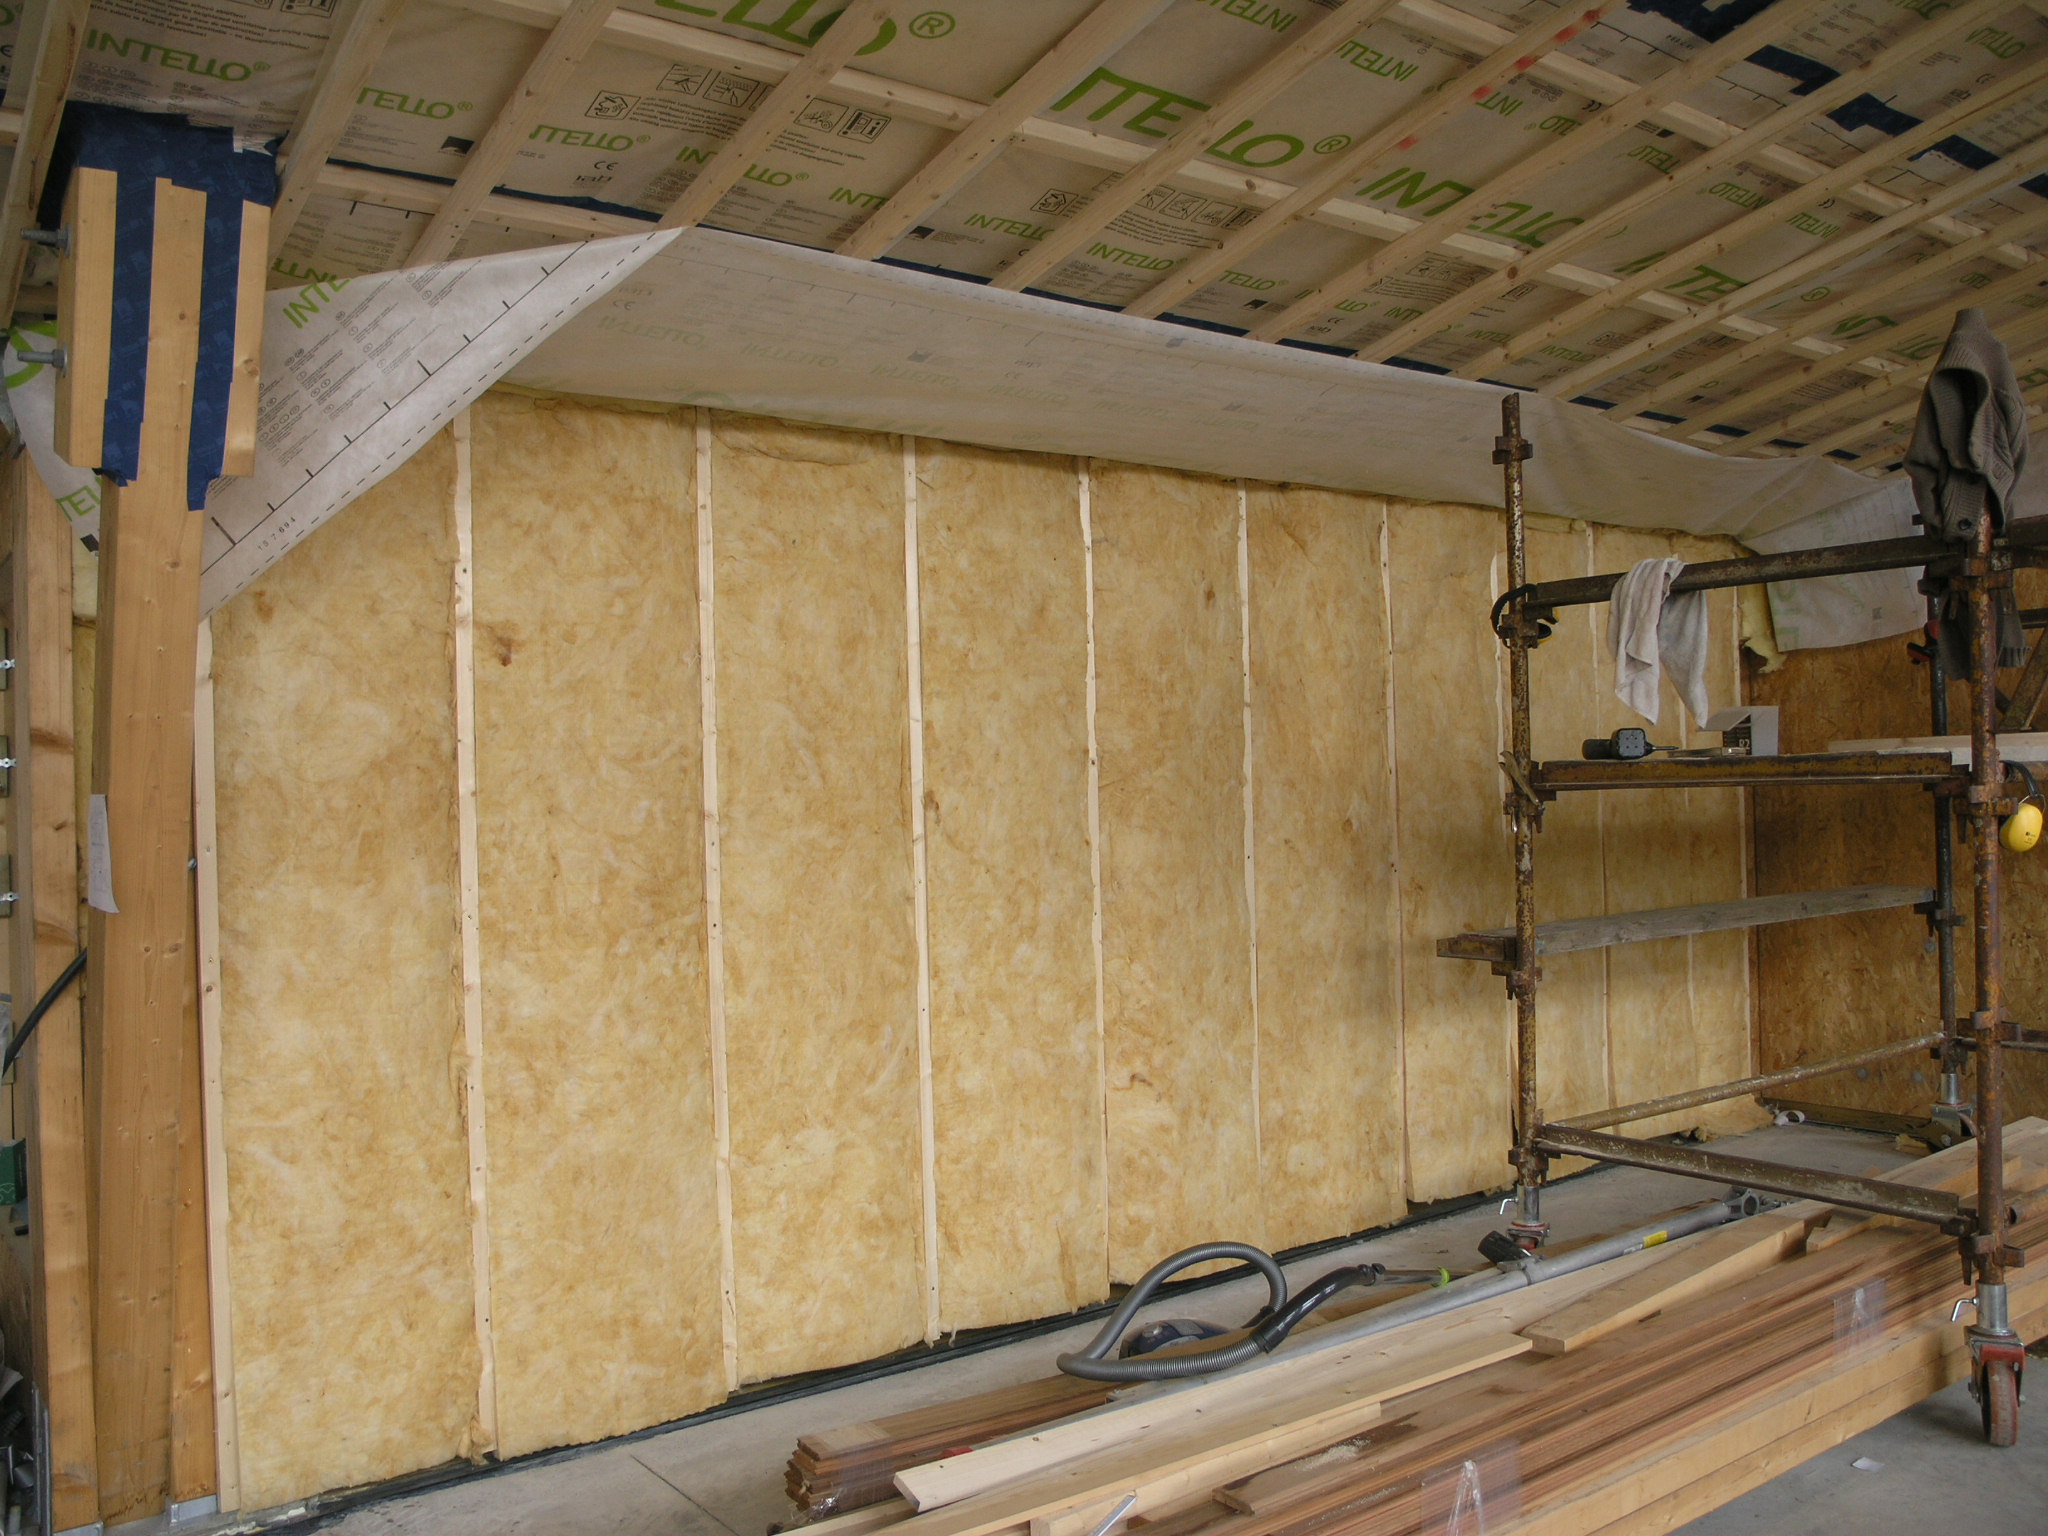
The building layer order of importance for a wall, roof and slab and the importance of continuity between the layers as shown below in order of importance.

  • Water control layer
  • Air control layer
  • Vapour control
  • Thermal control

The 500 year wall-Keep the water out of it. Allow the vapour to get out from the inside or outside if it gets in. Keep the air out of the wall from the outside and inside. Put all the thermal layers on the outside and put the cladding on the outside.

He also analyses the LEED energy standard.

To Vent or not to Vent (Roofs-cold, warm and SIPS)

This video covers venting and airtightness of SIP roofs.

What happens when one uses a white roof membrane versus a black one.

Building Enclosures

Why increasing insulation is a game changer in the future . Moisture and durability issues that lie ahead because of extra insulation.


Wall/Ceiling System

Wall/Ceiling  Electrical Services

For the internal wall build up I am using a double batten wall system. This wall system allows one to easily install services. In a previous experiment on building a workshop (used as a means to experiment on a small building before commencing the house) I installed a single row of horizontal battens on the OSB board. This made it very difficult to run services that need to run vertically. I had to install metal protecting plates and cut notches in the wood in order to ensure that I did not damage wiring due to the final layer of plasterboard screw fixing.

When one uses a counter batten system it facilitates running services such as power,  lighting, phone, internet, alarm etc without the risk of screw damage. This system also helps to reduce the cost of installing these services (see the image of a cable behind the batten below).

One can make use of a wall system like this if a soft insulation such as cellulose or fiberglass is behind the final batten which will support the plasterboard finish.

Wall Cable Routes
A row of battens run vertically behind the membrane in order to facilitate running services.

When working at ceiling level one may need to use a counter batten system in order to allow for recessed lighting otherwise it will mean installing special electrical enclosures cut into the airtight membrane. I have installed counter battens to a depth of approximately 90mm in the living and kitchen areas for LED downlights (see the previous post link on the 26/04/2015). In the bedroom areas I will only use a single batten system in order to install hanging pendent fittings.

Floor Level Insulation.

At floor level I installed Rockwool insulation for two reasons -one was to minimise the thermal bridging (heat loss around the wooden sole plate that the timber wall sits on) and the second reason was to minimise the damage to the insulation if there was a water leak.

I carried out a test where I placed 50mm of Rockwool RWA45  (product in the left bowl) and Metac (fiberglass-product in the right bowl below) in water in order to see what would happen if there was a leak. The Rockwool absorbs very little water but the fiberglass sank and became completely saturated and would possibly never dry out. Both insulation’s were submerged initially and then left for the duration of the test.

Rockwool Metac
Rockwool versus Fibreglass for water damage.

Below is an image of the Rockwool installed at floor level under the fibreglass in order to minimise the risk of insulation damage at floor level and minimise thermal bridging.

Rockwool
Rockwool Installed at Floor Level (green colour)

Airtight Membrane Installation

When installing the airtight membrane I was surprised how quickly the knife goes blunt. Rather than using the disposable knives and blades I now use a sharpener with the knife.

Knife and Sharpner